Learning 2D Animation Principles for Beginners
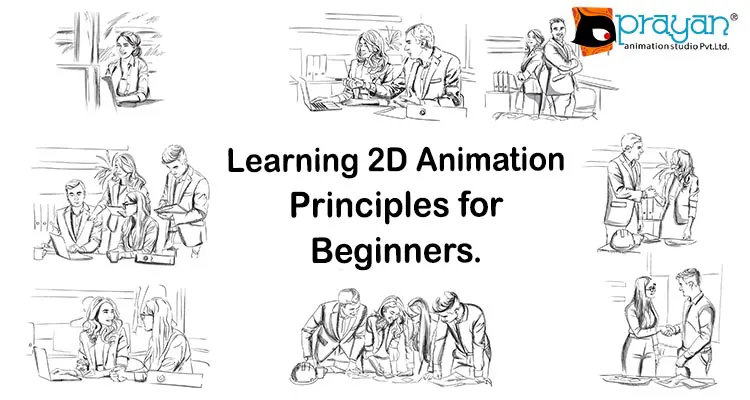
Things you need to know before getting down to your studies.
Whether it has been your childhood dream or you understand the meaning of animation in the prosperous industry of video content and digital marketing, learning 2D animation is a breathtaking journey and a perspective way to get new skills or get a valuable addition to your resume.
The development of various software and digital technologies made learning 2D animation both more available and sought after in the modern world. And while more and more content creators and brands understand the importance of engaging and digestible video content, 2D animation offers almost limitless possibilities to create, engage, draw attention and, of course, sell.
From short videos to full-time movies – 2D animation has its application in so many spheres of business and industries today that its knowledge has become a key demand for various specialists who are willing to work with visual content, design, and development.
In this article, we shall have a general overview of 2D animation – its types, production and post-production stages, and perspectives in our rapidly digitalizing world.
Types of Animation
Before getting down to mastering the art of animation, it is important to have a general understanding of different types of animation and their peculiarities. Knowing and distinguishing those types will help you determine preferable learning programs, software, and your perspectives on animation.
Traditional (Hand-drawn) Animation
This is the 2D animation we all know and love. Our favorite Disney characters and lots of other childhood heroes have been created with the so-called hand-drawn animation.
The name comes from the production process itself – the characters and numerous frames in traditional animation are drawn by hand. Back in the day artists were using paper and pencils, drawing each cartoon frame-by-frame and then transferring the images on acetate sheets for painting.
Since the beginning of the 1990s, traditional animation has become much less analog as frames can now be scanned and colored digitally instead of using acetate sheets. Paper and pens were also replaced by various planchettes and tablets with touchscreens and digital pens. However, the main feature of traditional 2D animation – drawing by hand – remains its distinctive feature and punch line.
CGI (Computer Generated Imagery)
Also known as 3D animation, CGI has granted us beloved characters from world-famous studios. Making objects look almost alive, CGI animation takes creativity to a whole new level, allowing it to bring to life any possible character or action, no matter how alien or wild it may seem. The same principle is used while creating video games and action movies.
While creating CGI animation, you will use a character rig – a digital marionette that will help you position your character and define its movements in the given space. The software produces certain keyframes for every move, and the animator continues to reframe them until the image starts to look natural and life-like.
CGI animation is quite a complex process and it usually involves several experts. Each of them deals with a certain character or scenery features, textures, light and shading, and various other elements.
Flash Animation
Another type of 2D animation, Flash is a combination of traditional hand-drawn techniques with the features of 3D animation.
The characters in Flash animation have those traditional 2D looks and look pretty hand-made. However, unlike in hand-drawn animation, an artist may use a technology similar to rigs from 3D technology.
In other words, Flash animation allows an artist to change the position of the character or develop his move without the need to re-draw the whole scenery.
Flash animation became popular at the beginning of the 2000s and skyrocketed after the technology was purchased by Adobe in 2005. Today it is simply impossible to imagine animated video content or web design without a certain load of Flash animation.
Getting down to work – preproduction of storyboard.
Preproduction is the key stage of any animation project. Before getting down to actual work it is very important to have a clear blueprint of the upcoming work. At this stage, you will determine which resources you will need to bring the concept to life and estimate the production time.
In case you are creating a project for a customer, pre-production is the moment when you can check that your vision of the upcoming project aligns with the customer`s demand.
Pre-production usually consists of the following stages:
- Briefing/debriefing
- Concept determination
- Visual development
- Storyboard
- Motion storyboard
However, storyboarding might be the most thrilling part of the whole pre-production process. It allows you to imagine and explore the whole universe that you are going to create with your animation.
Storyboarding allows a director to check the idea, see if it looks probable and all the details of the upcoming action check out. In other words, a storyboard is a sketch that represents the whole story and demonstrates its contents and development.
Preparing the Scene Animation – bringing a new universe to life
If storyboarding gives you a schematic understanding of where and how your future characters will live, scene animation is the ultimate embodiment of this imaginary land that will determine all the details and atmosphere within your animated project.
Although the process itself is a subject of the whole course on animation, here we shall describe the main stages of this process.
- Concepting – Although concepting is quite a schematic image of the upcoming scene, the more detailed you make it, the easier it is later on to create the final image. The sketches created at the concept stage will become a guideline for every animator involved in the process.
- Arranging the work frame – whether you are working alone or with other animators. It is important to establish a determined work pipeline. From choosing software to arranging the files – the more restricted and clear the work frame is, the more efficient the overall process will become.
- Pre-visualization – it is a very rough scene presentation that will give a clear understanding of how the overall scenery will look and develop in the final variant. Sometimes animators also put schematic images of characters and other objects in the scene at this stage to demonstrate proportions and make necessary adjustments, if needed.
- Modeling – depending on the desired result, you may need various details in your scenery. Modeling allows you to create several variants of the same object or various objects of the upcoming scene, that will make the overall impression and create the atmosphere.
- Populating the scene – at this stage, you define the placement of various objects in your scene and place certain “joining” elements, if needed.
- Additional characters – once you create an outdoor scene, adding some characters in the background makes the overall picture more livable. Birds, insects, background characters, or cars – all those elements turn a schematic image of a scene into an actual atmosphere.
- Composing – This is the final stage, where you bring all the designed elements together into one scene and bring it to life. At this moment you see the final scene image and can understand whether some elements need adjustment or maybe eliminated not to overload the scene.
Understanding the traditional principles of animation. Is Disney’s legacy relevant in today`s 2D animation?
Introduced in the 1980s by Disney animators Ollie Johnson and Frank Thomas, those principles describe the key guidelines of how any character should be animated to create a life-like impression on viewers.
Although the technology of 2D animation has evolved greatly since those ideas were introduced, they will never lose their significance. Understanding them an animator may easily give believable features of a living creature to any object – from a geometric figure to a plant or rock.
1. Squash and stretch
As long as our brain accepts and interprets gravity unconsciously, the movements of an object that should be determined and restricted by it are crucial for the acceptance of the scene. The main embodiment of this principle is bouncing off walls or jumping. However, it is very important to observe the volume and physical features of the object to make its moves live-like.
2. Anticipation
This effect prepares a viewer for what is going to happen next by observing the common ruler of physics or behavior. Just like you would bend your knees before jumping, anticipation is a feature that helps you see the movement of the object and story development more probable.
3. Staging
It is important to focus a viewer’s attention before showing the development. Staging allows one to point out the character that is about to take an action or demonstrate his intention.
4. Straight and pose-to-pose action
Those are animation techniques that will determine the overall atmosphere and action. Straight-ahead action demonstrates the first and the last action frames with all the frames in between. This is a more realistic life-like presentation of movement. Pose-to-pose is a more schematic and “jumpy” image when a character goes straight from one position to another.
5. Follow-through and overlapping action
This principle demonstrates the concomitant movements of a character while it is moving from one point to another.
6. Slow in and slow out
The way that a character stops is also important. The best way to illustrate this principle is to imagine how a car moves and stops. Gaining speed is a graduate process as well as stopping.
7. Arc
Another movement protocol that coincides with the laws of physics and characteristics of an object. It makes the movement more natural and the overall scenery probable for a viewer.
8. Secondary action
Just like in real life, every action causes contraction, animation often uses secondary objects to support the overall impression and make motion life-like.
9. Timeline
Another principle is based on physics. The movement of the object should be determined by its physical characteristics. If it moves in space faster or slower than it would have in real life, the overall action will look unnatural.
10. Exaggeration
As much as all those principles are aimed at making the action more realistic and life-like, exaggeration is important as it does not let animation become a boring too-realistic image.
11. Solid drawing
Even while dealing with 2D animation, it is important to understand the drawing principles and the possible existence of an object in a 3D reality
12. Appeal
Quite a subjective, this principle dictates that every character needs to be appealing to a viewer. The effect is reached by granting a character distinctive personal features or certain behavior patterns. In other words, even a non-living object, once animated, should be relatable to a viewer.
Animation production – when the magic happens
Now, that you have gone through all the theoretical preparations, passed the pre-production phase, and have a clear vision of the upcoming 2D animation, it is time to go through the production process.
It may be pretty complex and involve the simultaneous work of several people or performed individually. However, the main production stages are:
- Storyboard
- Audio
- Animatic
- Layout
Here is a brief explanation of the process. Once the script is written and the storyboard is built, animators start to create a detailed design of the scene and place characters in it. Then there comes the work on the sound. Except for the voices and dialogues of the character or narrator, there may be a need to create background audio. Sounds of street or nature make the overall scene more lively and believable.
Then animators start to join the image of a character with his voice and behavior pattern by carefully drawing out every move and mimics. Then the layout is created – at this step, a director determines the position of the camera, angles, lighting, and shades that tie all the images into one common scene.
Once all the stages are passed, the actual production begins. From now on every animator has a clear vision of every frame and can work on the details carefully, bringing the overall concept to life.
Post Production – the final touches
Post-production is the process that allows us to calibrate all the elements of the overall animation project, give some final touches, and add special effects that will finalize the overall picture.
Post-production includes:
- Final editing of the visual image
- Audio editing – adjustment of dialogues, background sounds, or music and adding sound effects
- Dubbing – once the image is perfect, there is a possibility to add voices or synchronize alternative voice acts in a different language
- Distribution – from now on the project is ready to be transferred to the customer or be distributed on offline and online platforms.
Animation is a thrilling and perspective industry that will never lose its relevance. Evolving and developing 2D animation managed to adopt modern technology and become an integral part of modern video content and pop culture.